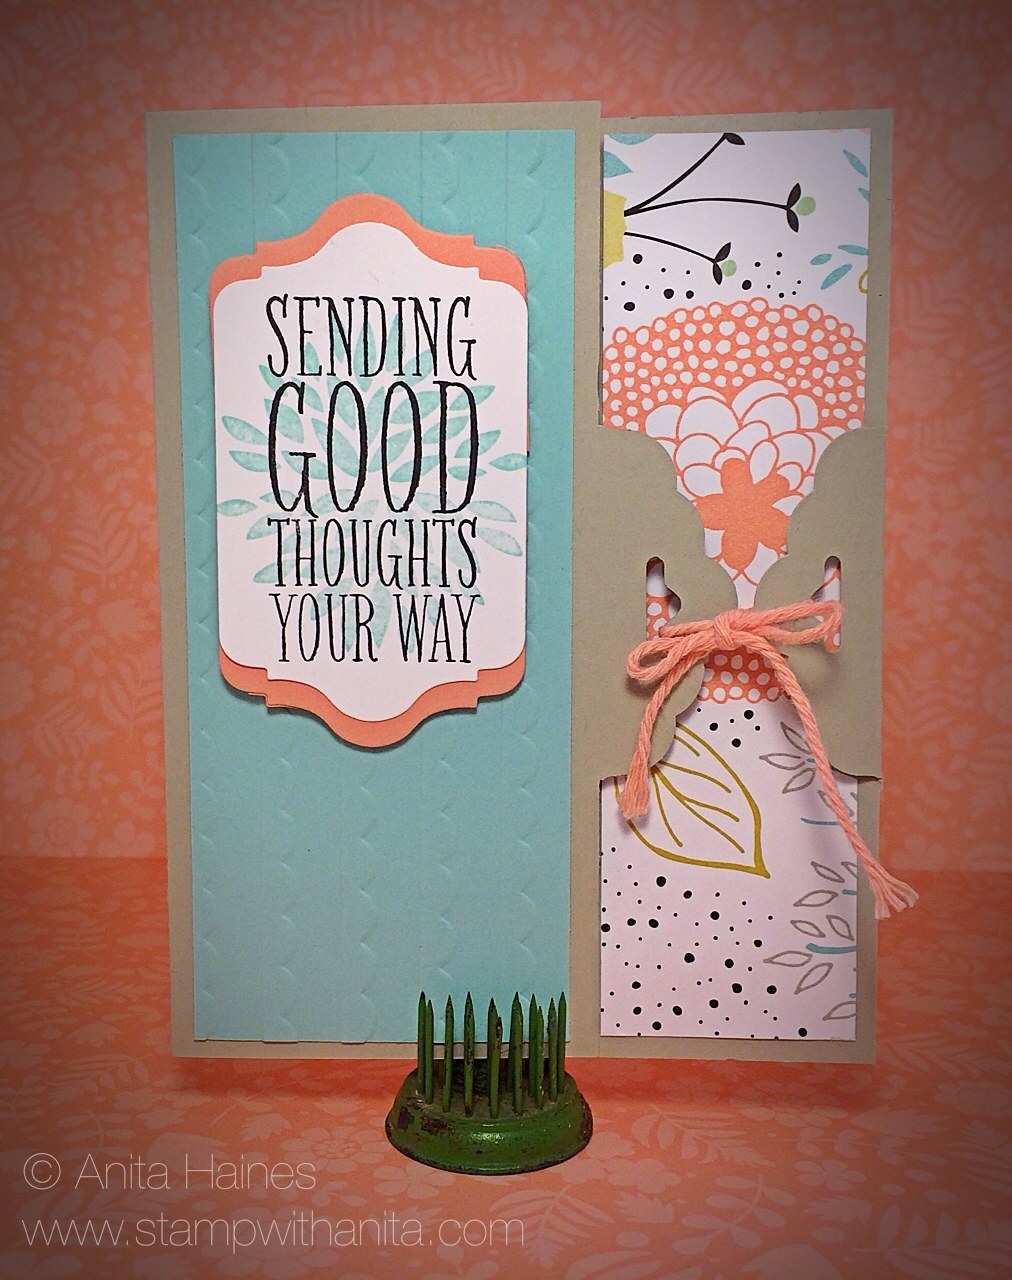
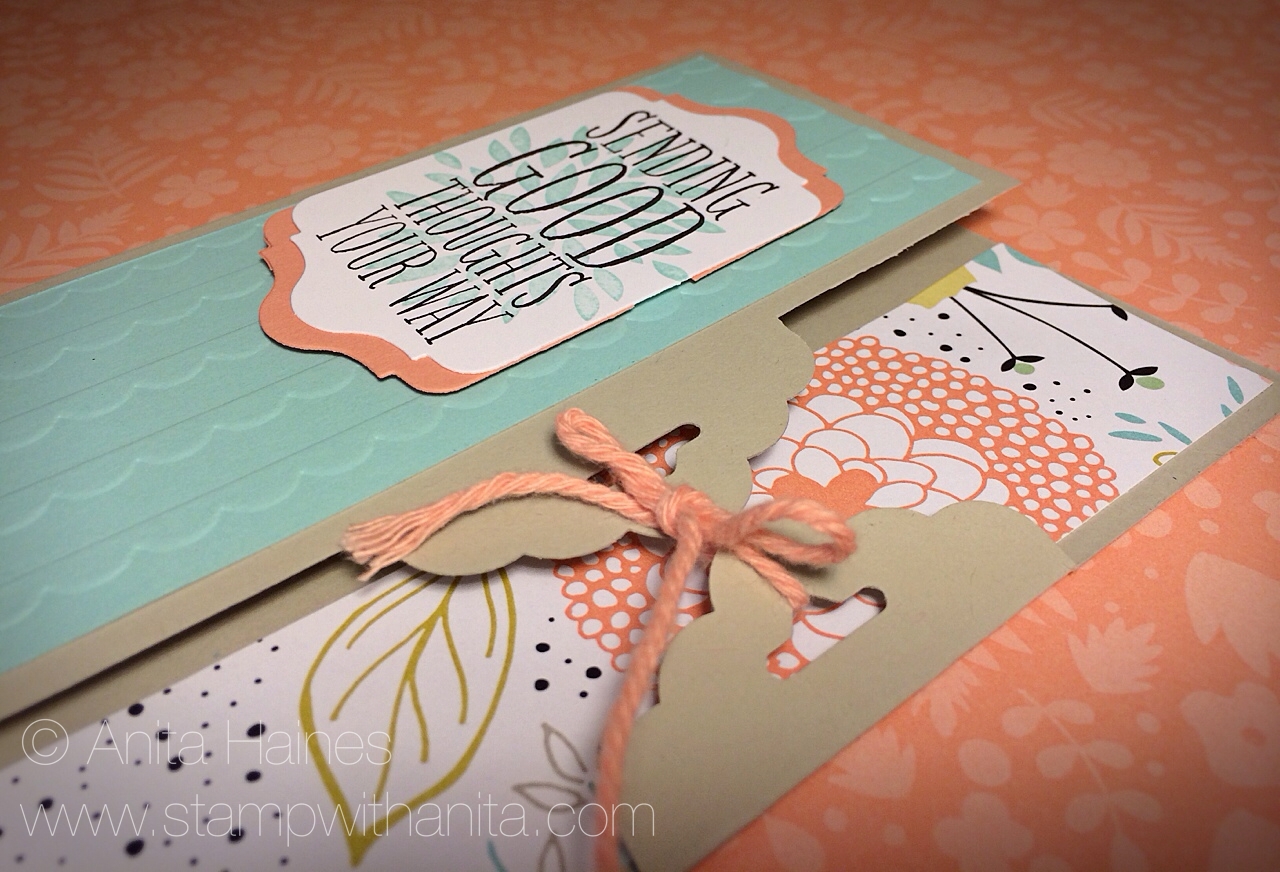
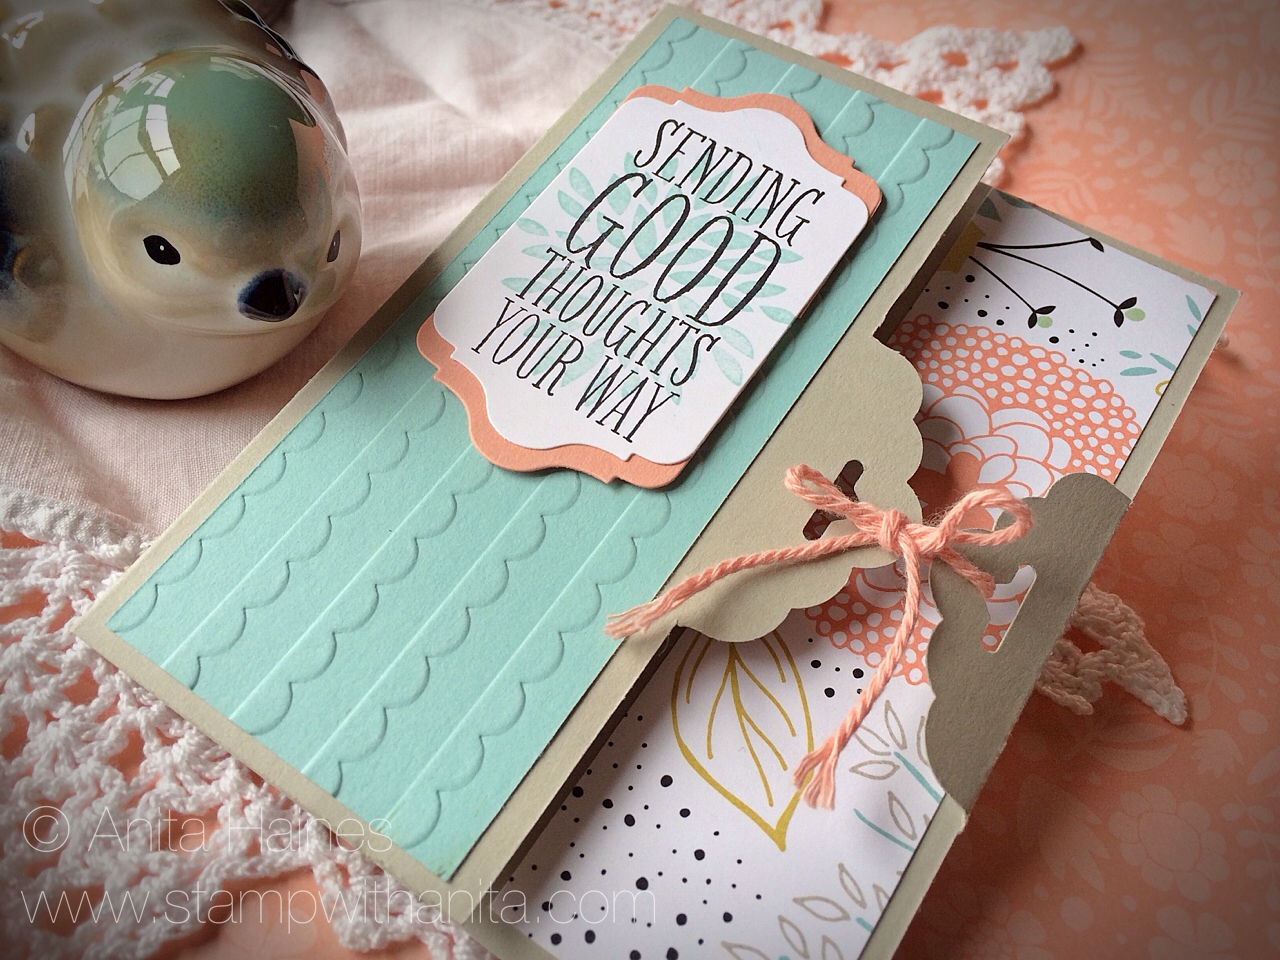
It’s been a busy time filled with kid’s activities and sharing in their awesome accomplishments. I will take time to share more on that with you in another post, but wanted you know that even though I’ve been away from posting my thoughts have been with you all. I don’t know about you but this long Winter has really taken a toll on me and my energy level. But today on this first day of Spring I wanted to share a beautiful Spring card that has a special closure that features the new Scalloped Tag Punch.
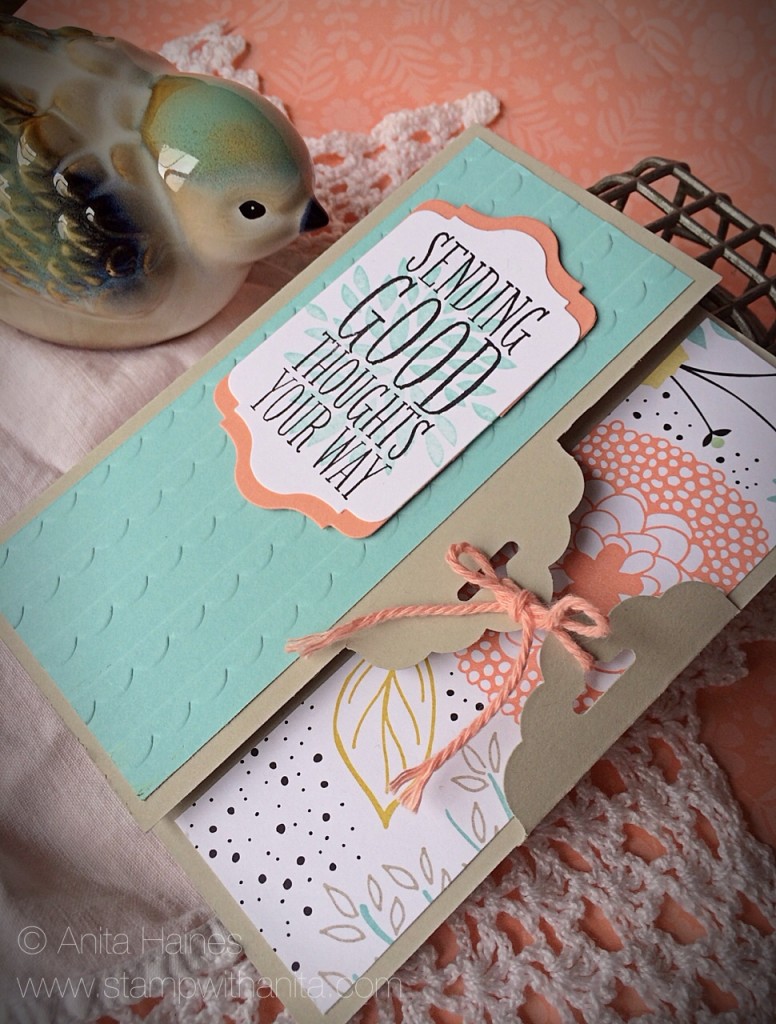 I just love the colors on this card and how it beckons Spring to come. I know I am so ready for warmer weather…. my aching joints are crying out for it to come soon! This card was inspired by a make & take Addy Jester designed for us at a team meeting. I added my own little flare by using the Chalk Talk Framelits Die. So let me share with you how to make this card…
Scalloped Tag Topper Punch Card Closure
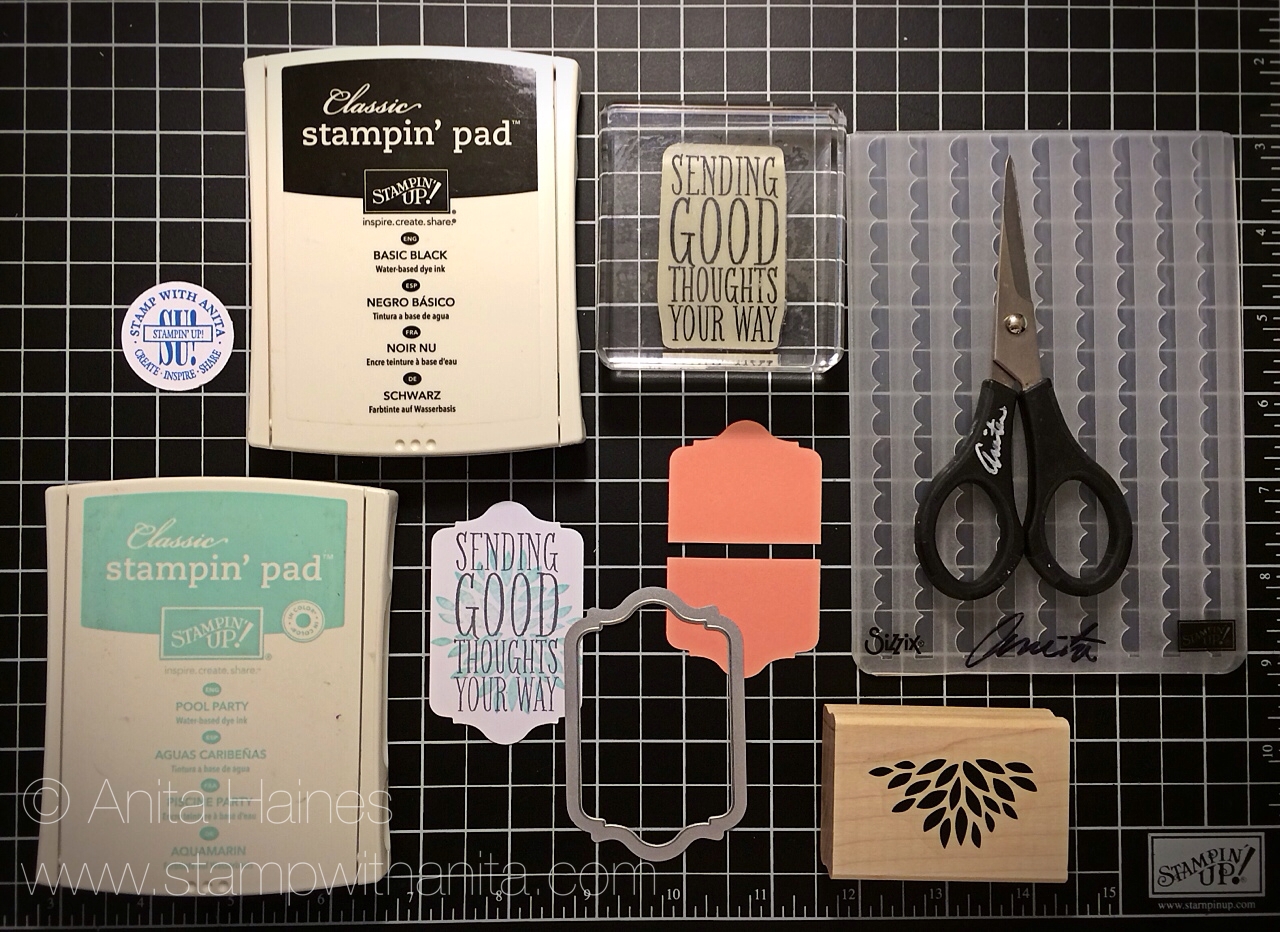
• Petal Parade Stamp Set – wood (#133599), clear (#133602) SAB Product
• Perfect Pennants Stamp Set – wood (#133227), clear (#133230)
• Pool Party Classic Ink (#126982)
• Basic Black Classic Ink (#126980)
• 8 1/2″ x 5 1/2″ Sahara Sand Cardstock (#121043)
• 2 1/4″ x 5 1/4″ Pool Party Cardstock (#122924)
• Crisp Cantalope Cardstock (#131298)
• Chalk Talk Framelits Dies (#129983)
• Stampin’ Trimmer (#126889)
• Scalloped Tag Topper Punch (#133324)
• Scallops Textured Impressions Embossing Folder (#132971)
• Sweet Sorbet Designer Series Paper (#133521) SAB Product
• Crisp Cantalope Twine from the Sweet Sorbet Accessory Pack (#133522) SAB Product
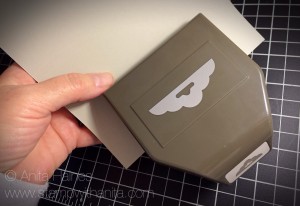
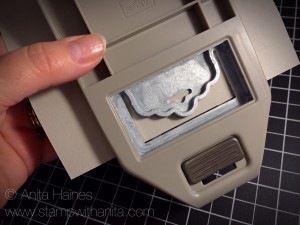
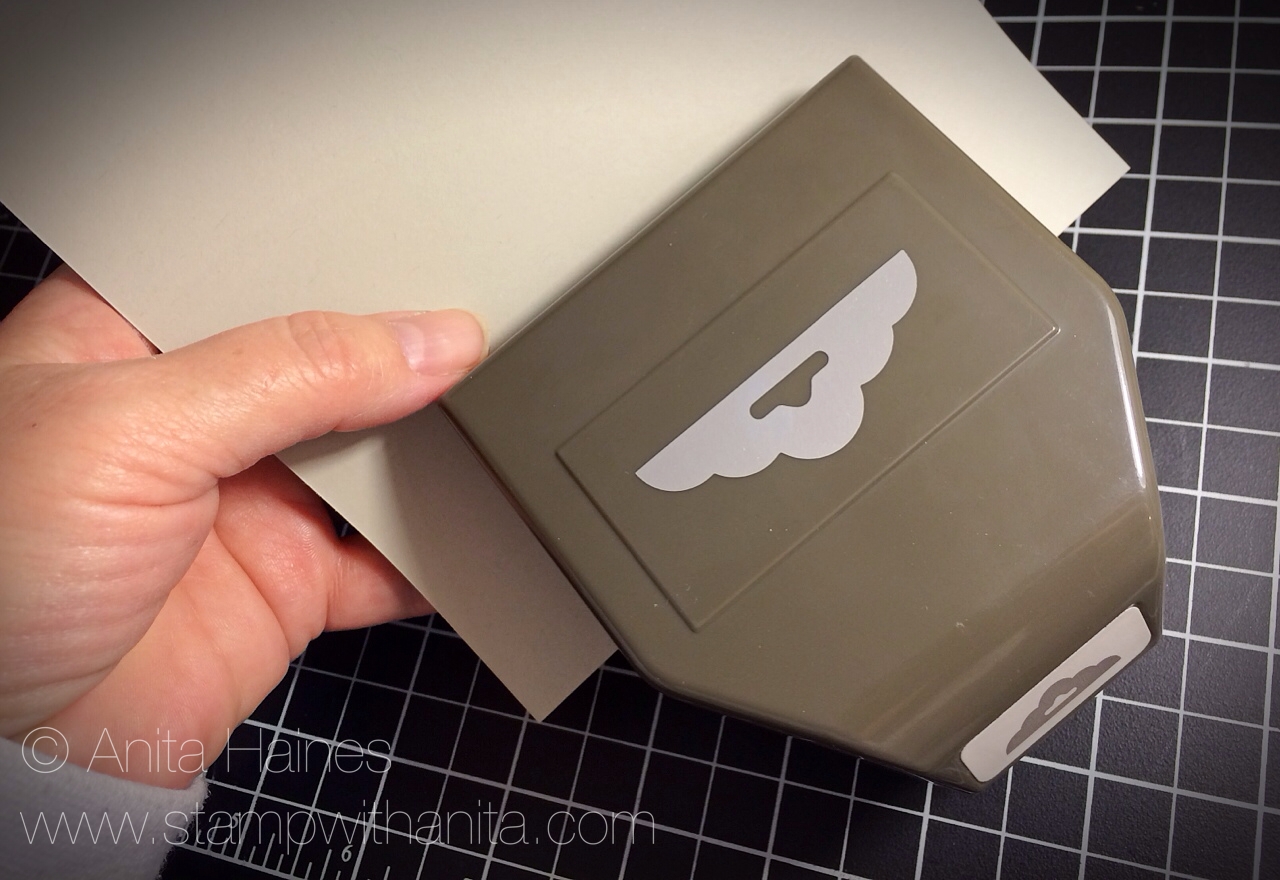
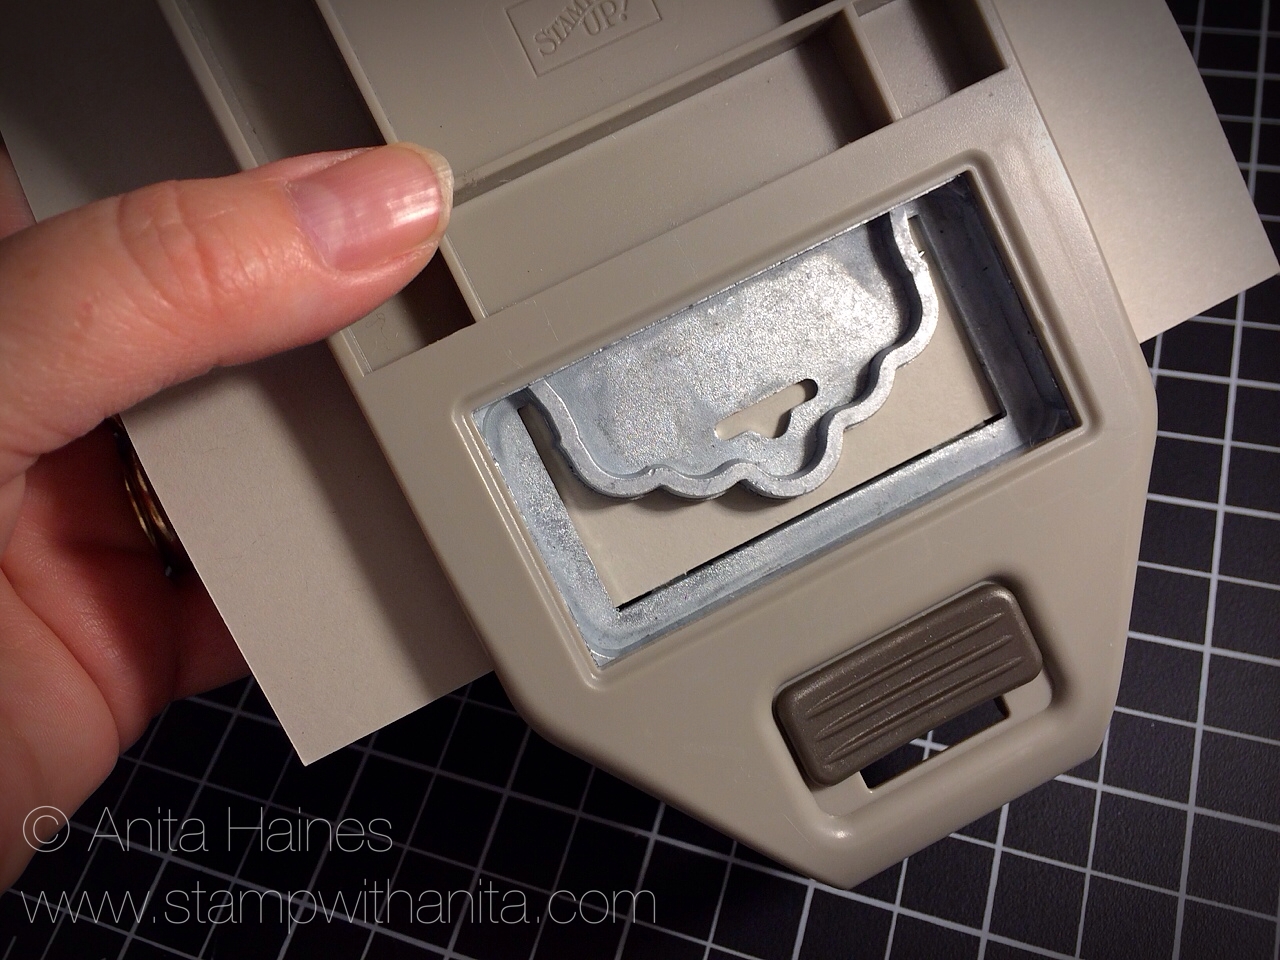
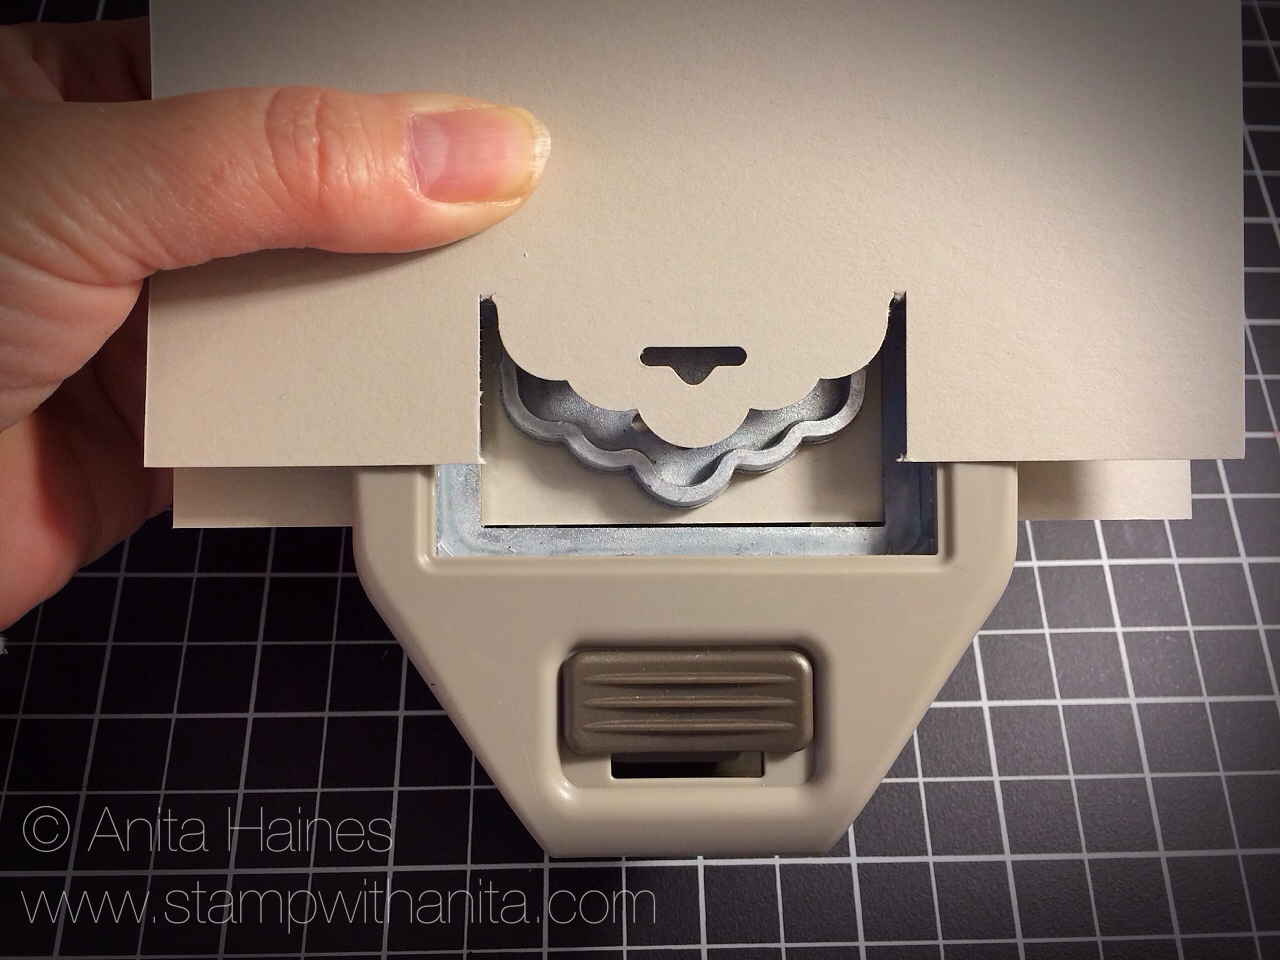
Start with a 8 1/2″ x 5 1/2″ piece of cardstock. You will be punching on both 5 1/2″ ends. Insert cardstock into the Scalloped Tag Topper Punch all the way and center from top to bottom. Before you punch look from the back so you can see that the card stock is pushed flush all the way into the edge of the punch. You will do the same on the opposite side. See photo and tip below to get both sides matched up.
 TIP: To easily match up both sides so they are aligned insert the opposite side of the cardstock and when looking from the back pull the side of the cardstock that you already punched back over to where you are punching now and you can visually align both sides up to match.


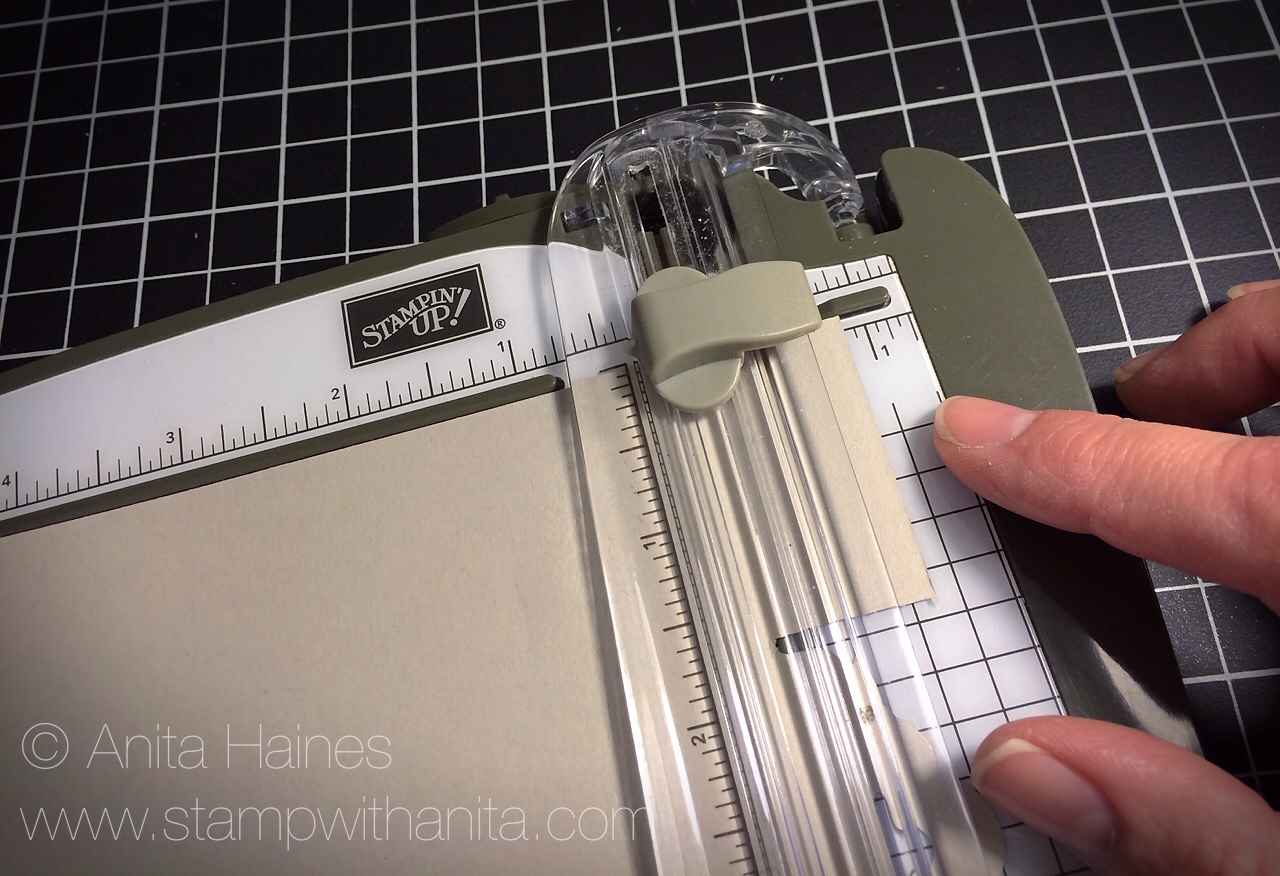
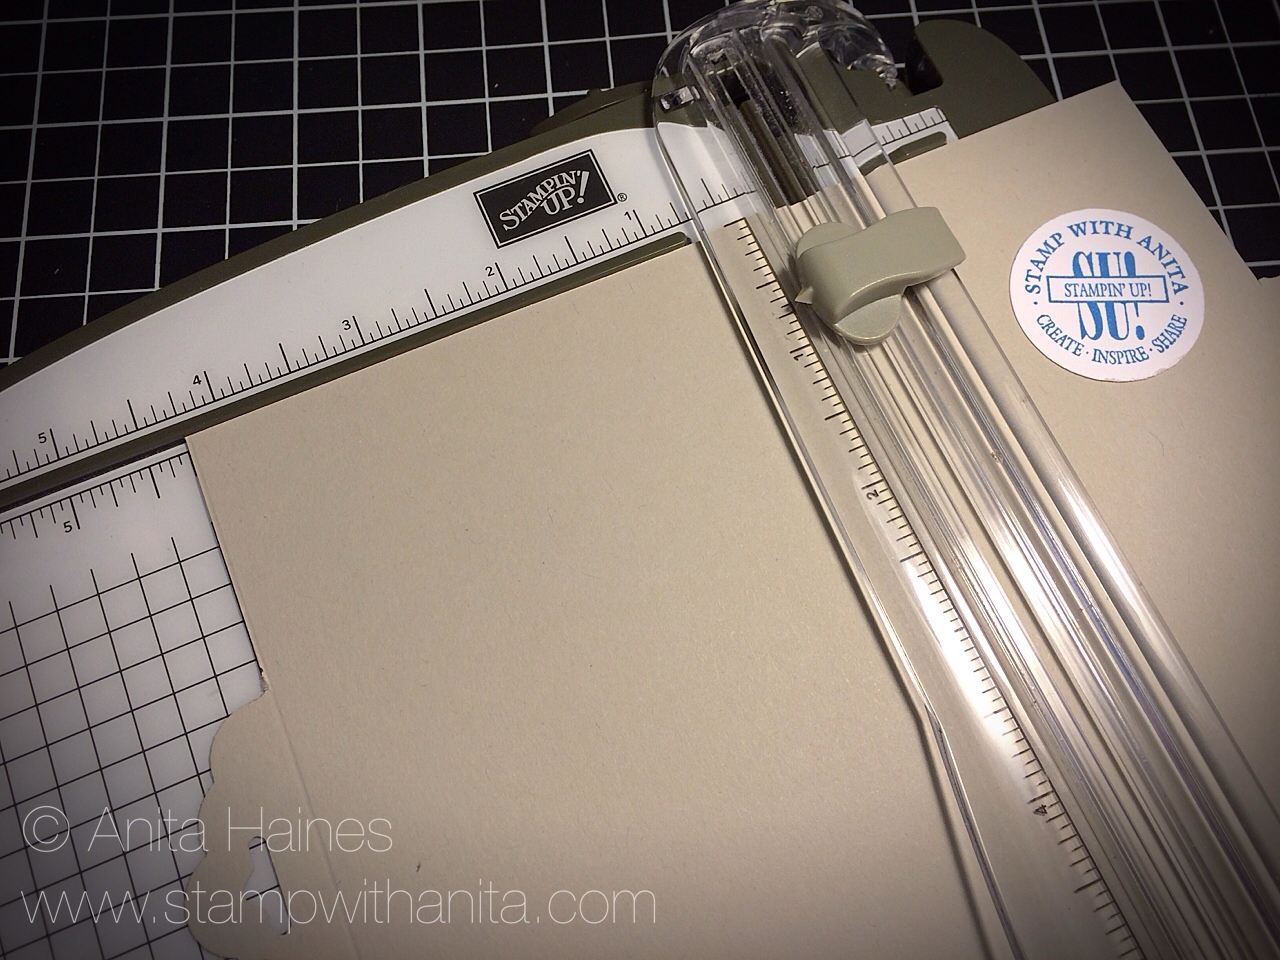
Now with both sides punched you will score the right side of your card. Use the Stampin’ Trimmer and score down along where the punch cut into the cardstock. On my Stampin’ Trimmer the cardstock lined up at the 7/8″ mark as shown above.
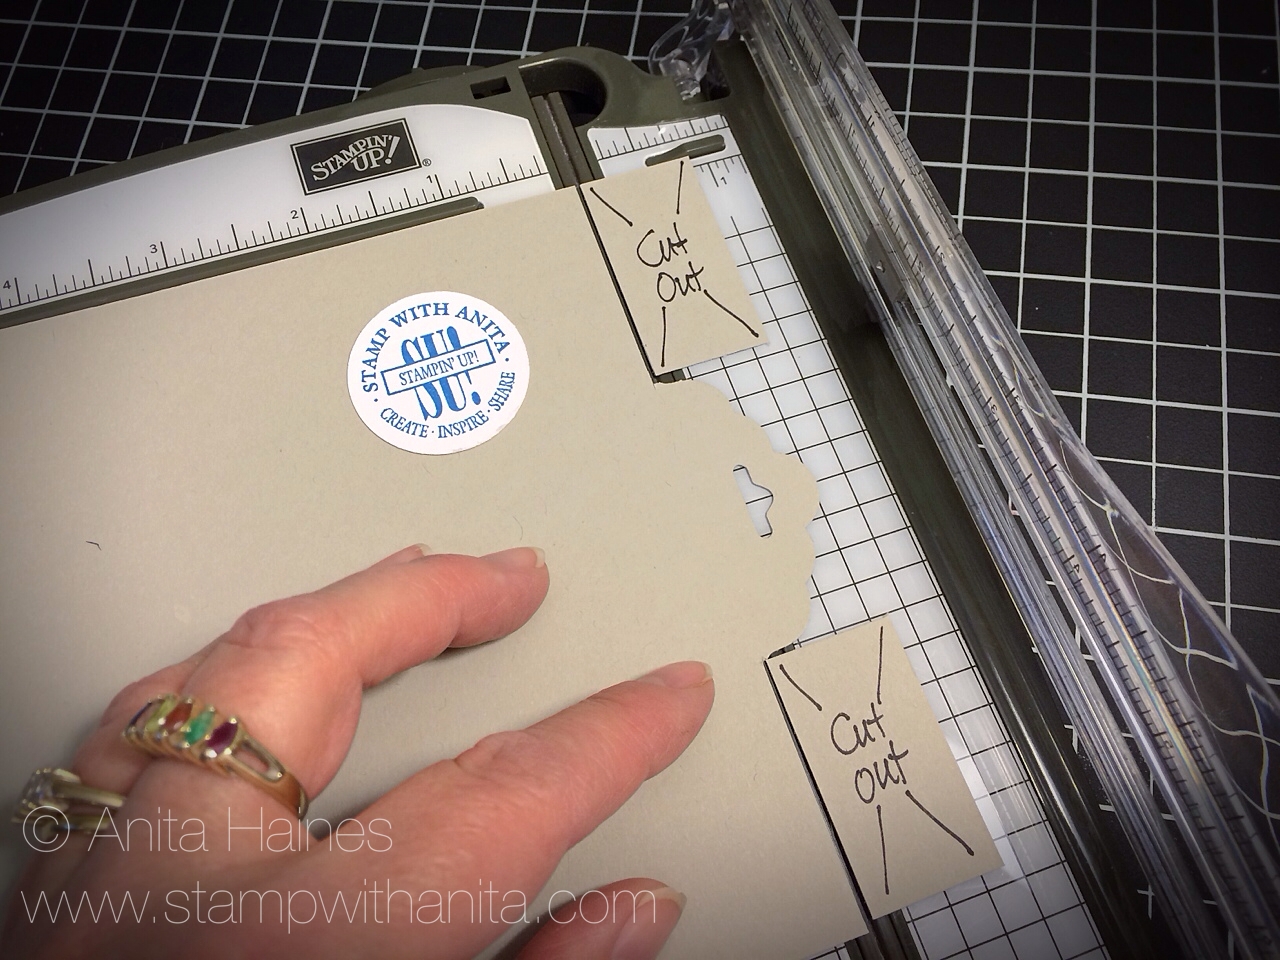
 Once you have the first side scored you will then cut away the extra pieces as shown above.
 You will then do the same thing to the other side that you punched… but on this side you will only need to cut the pieces away and NOT score.
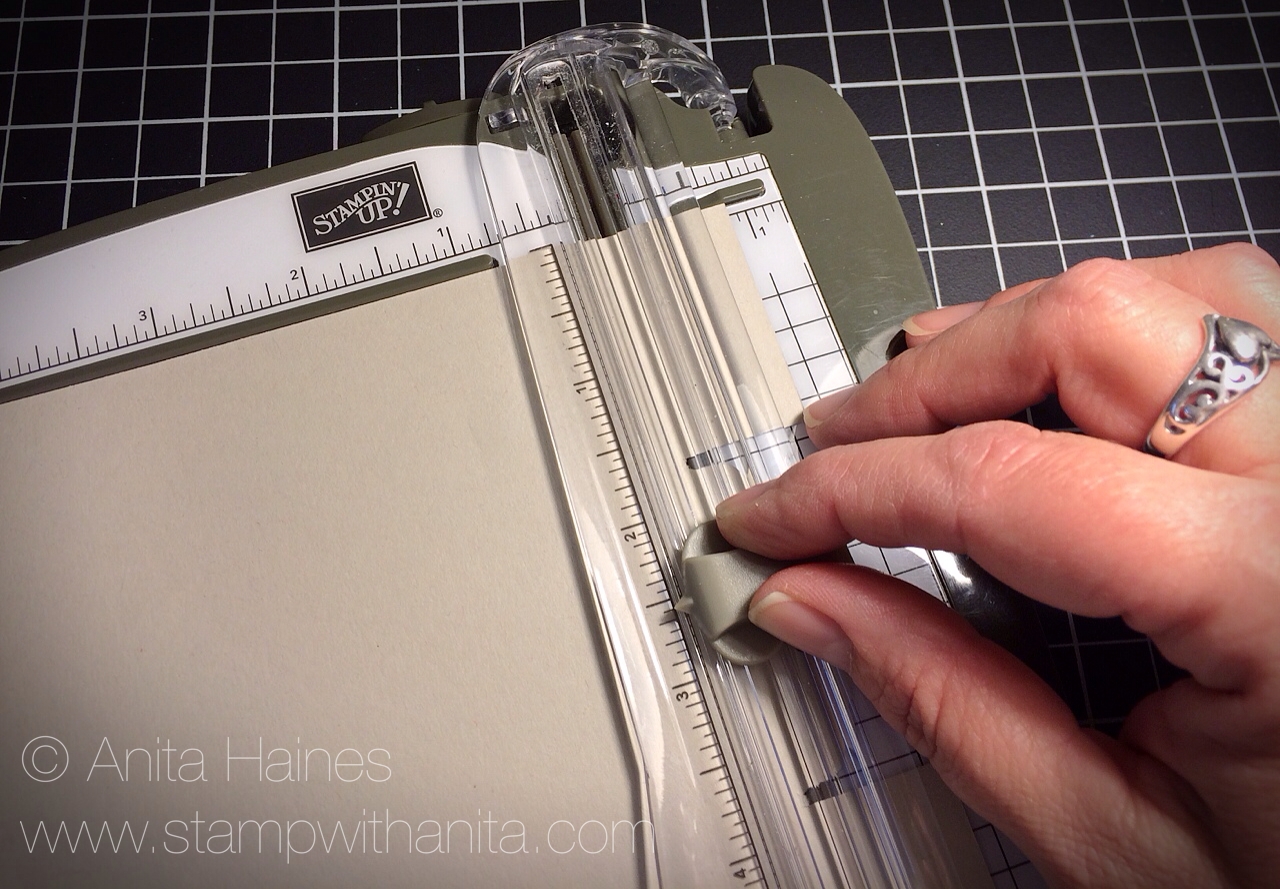
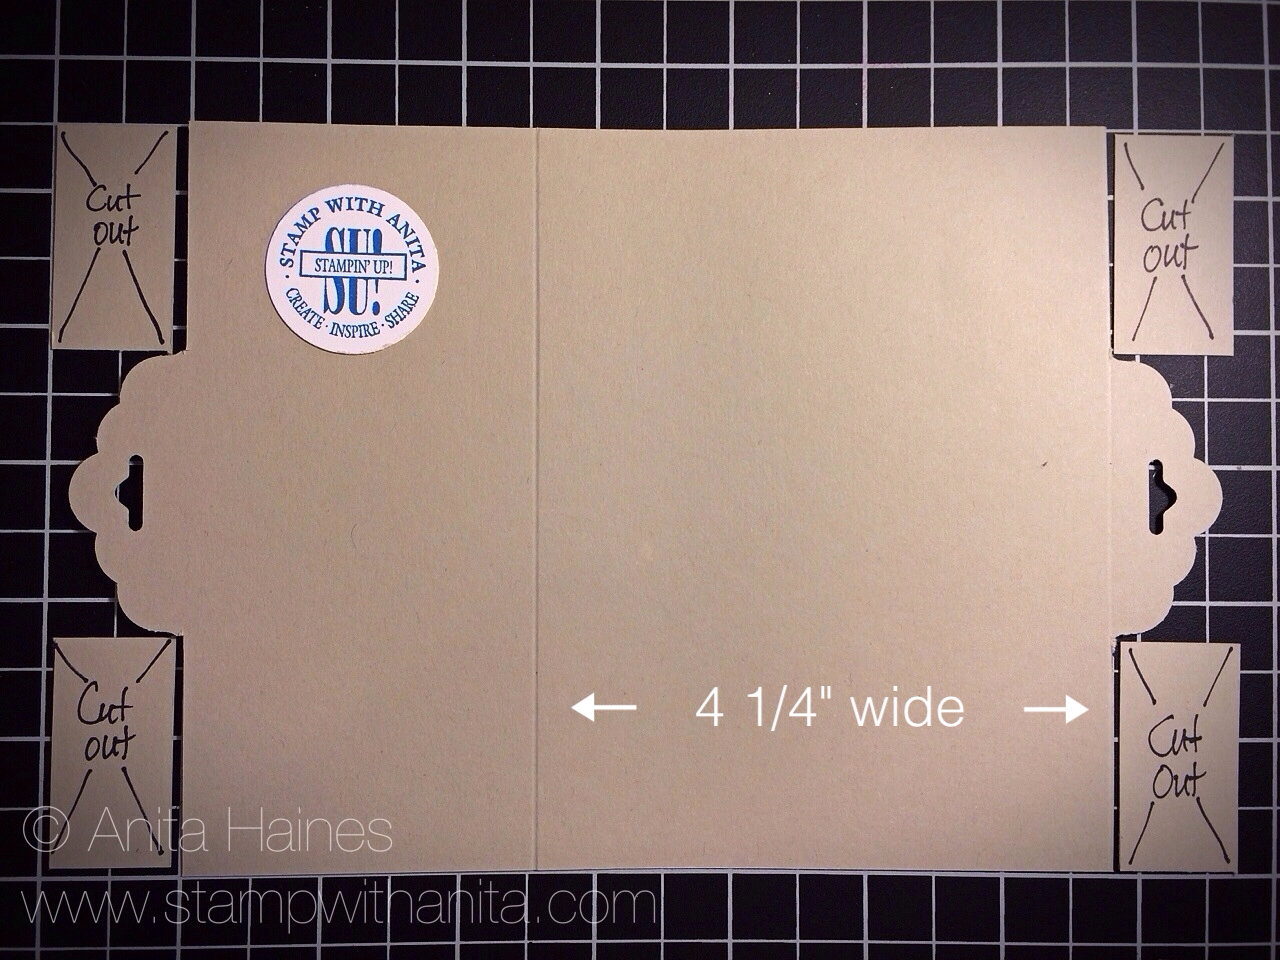
 Once both sides are complete you will slide the piece of cardstock back into your Trimmer and the side that a has the cut and score you will score again at the 4 1/4″ mark. This will become the back/inside of your card and will make more sense as you go along.
 When you are finished this is what you should have. You can discard the cut out pieces.
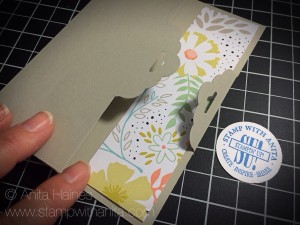
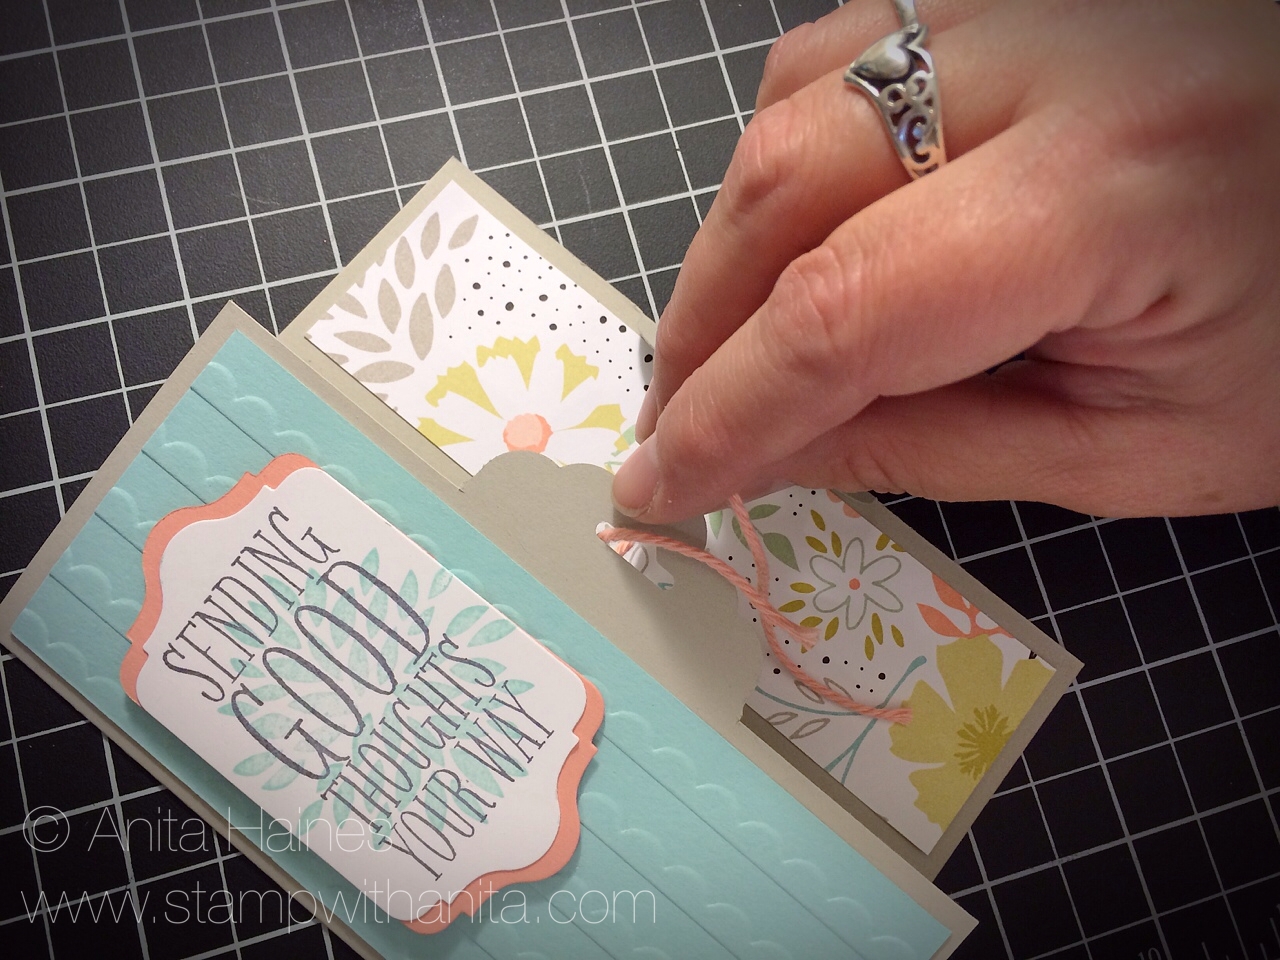
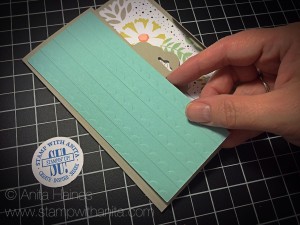 Fold your card on score lines and finish as desired. For my card I attach a 1 1/2″ x 5 1/4″ piece of Designer Series Paper (DSP) on inside right edge as shown. I used the lovely Sweet Sorbet DSP (#133521) that you can earn for FREE right now during Sale-A-Bration. On the outside flap I embossed a 2 1/4″ x 5 1/4″ piece of Pool Party Cardstock with the NEW Scallops Textured Impressions Embossing Folder (#132971) found in the Occasions Catalog.
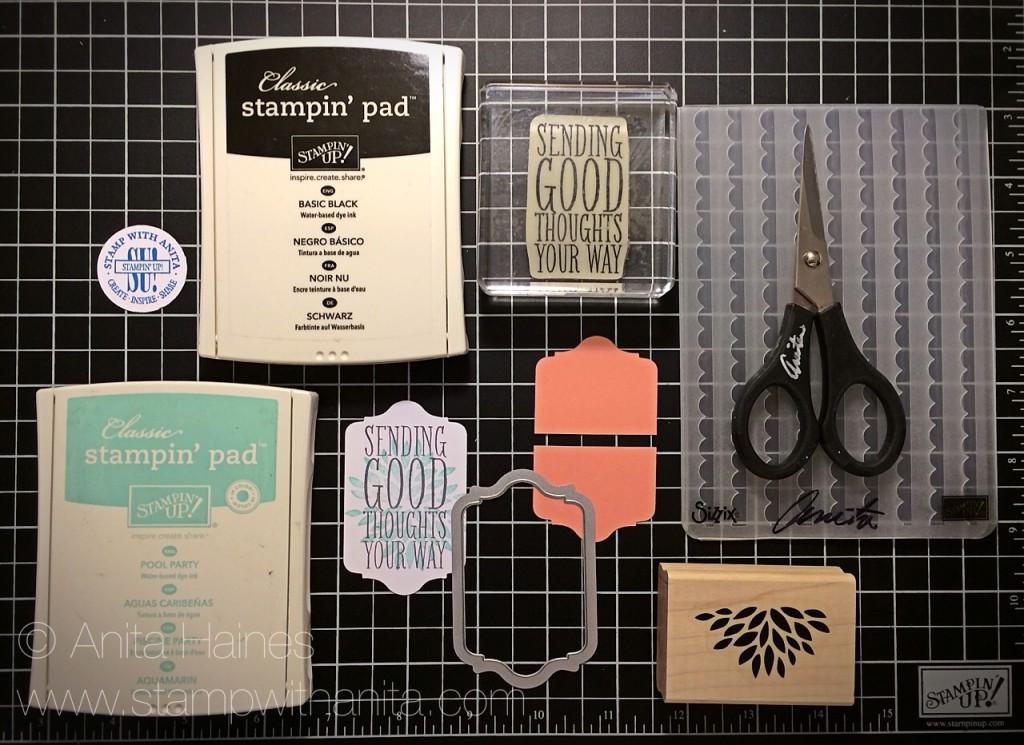
Pictured above are all the products I used to complete my card. Item numbers and links to my online store are listed in the supplies at the beginning of the tutorial to make it easy for you.
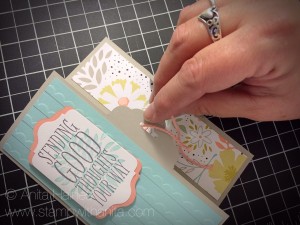
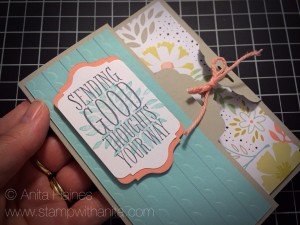

To finish my card off I tied the Scallop Tag Punched ends together with a piece of Crisp Cantalope Twine found in the SAB Sweet Sorbet Accessory Pack shown below.
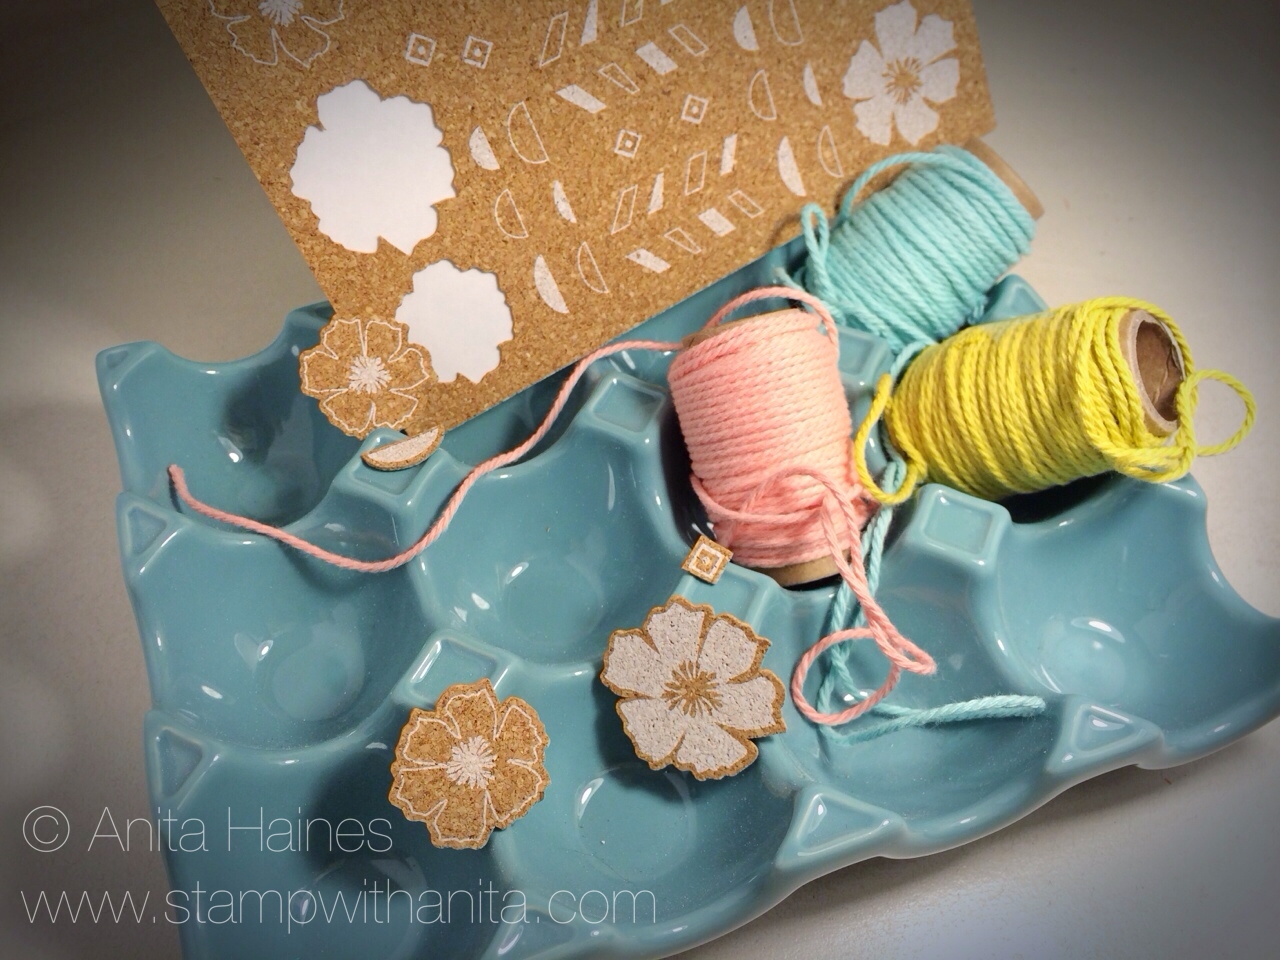
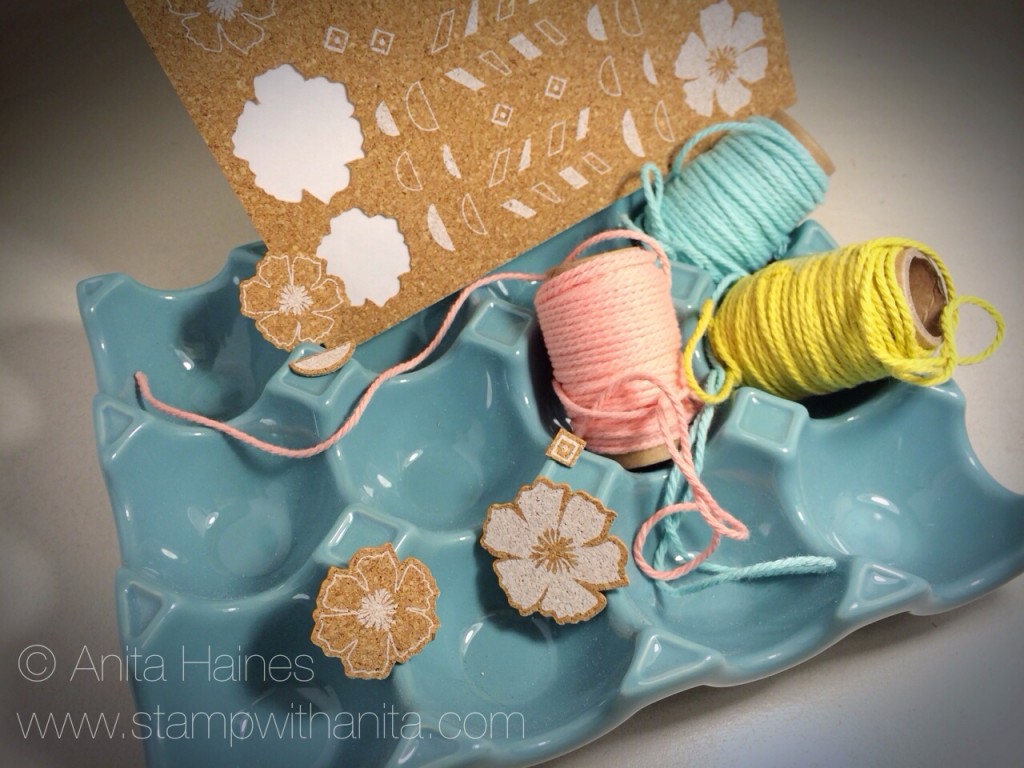 Look at all this yummy goodness you can earn for FREE during Sale-A-Bration. The twine from the Sweet Sorbet Accessory Pack (#133522) was the perfect touch for my card. The Pack comes with three spools (10 yards each) of beautiful twine and a sheet of adhesive-backed die cut images printed on cork.

Here’s to the coming of Spring! Sending good thoughts your way!

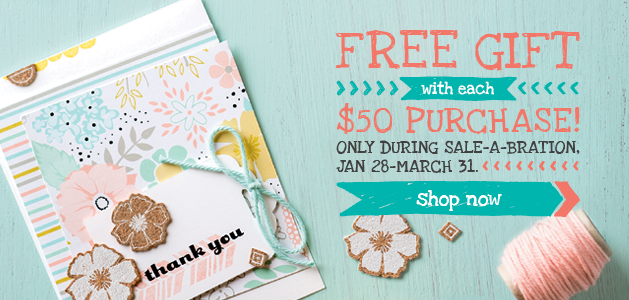
Don’t miss your chance at grabbing your favorite Sale-A-Bration (SAB) products. Once March is gone so are these products. During this awesome promotion you get to choose a FREE SAB product for every $50 you spend. Place at least a $50 order in my online store using this HOSTESS CODE 6U6XKXKX by March 28th and not only will you get to choose a FREE SAB item I will send you this card so you can have to send or have to duplicate.

“May the Lord of peace himself give you peace at all times and in every way. The Lord be with all of you.” ~ 2 Thessalonians 3:16
Blessings and Happy Stamping!
Anita Haines